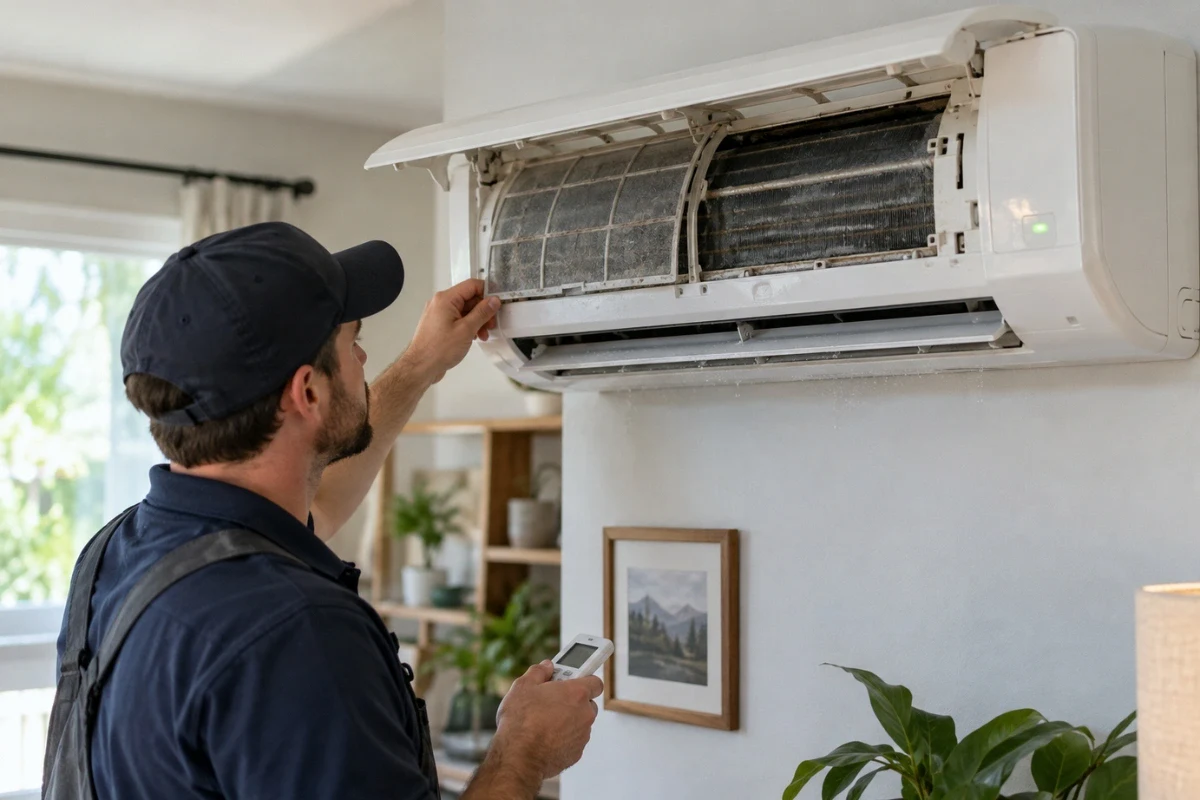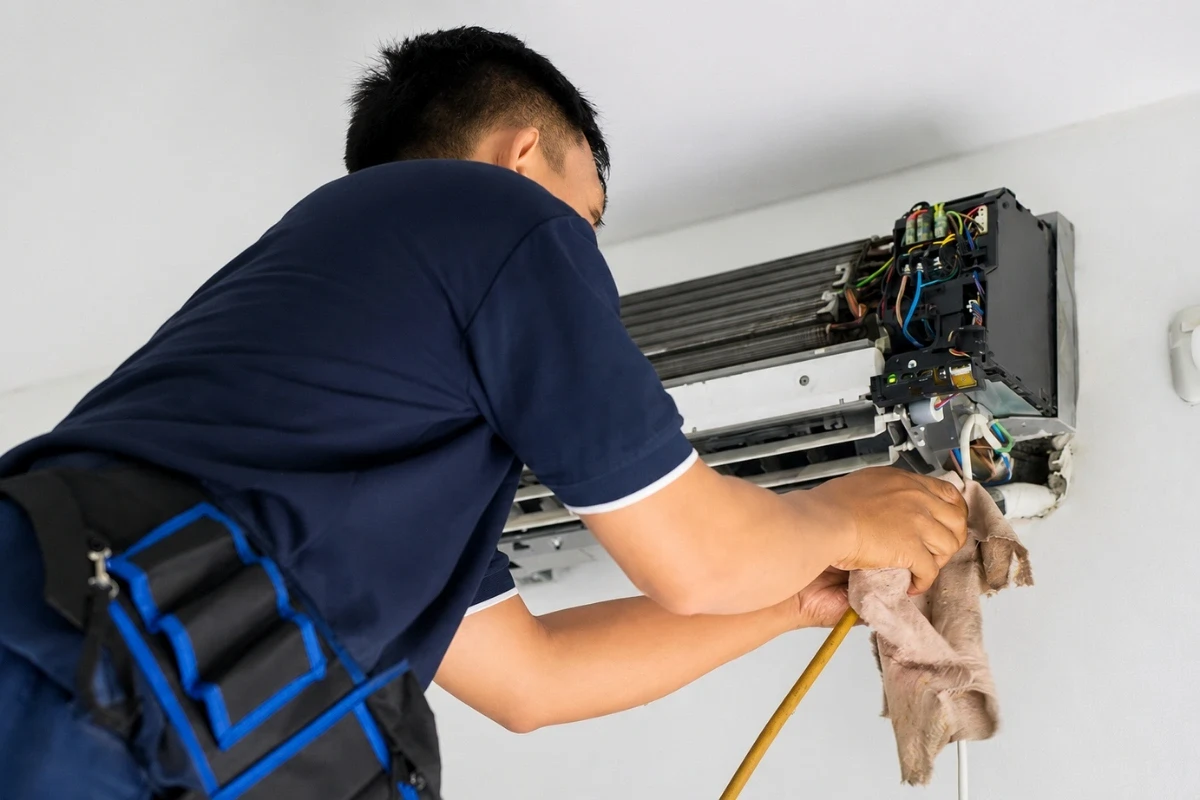
To check hvac airflow, run it for 15–30 minutes with all vents open and a clean filter. Make sure airflow feels strong and consistent at each register, listen for any unusual sounds, and confirm that every room reaches the set temperature evenly.
Post-HVAC installation testing is a must, especially airflow testing. Because Durham’s mostly hot, humid environment. Even a brand-new system can struggle with air issues. Such as weak air, uneven temperatures, or duct imbalances.

These issues can raise energy bills and reduce efficiency. Proper testing ensures your comfort, saves energy, and money in the long run.
As an experienced HVAC expert from Alternative Aire, I will help you detect whether your airflow is poor, provide a post-installation airflow checklist, offer troubleshooting ideas, explain ways to balance airflow, and more during the post-HVAC installation phase.
Key Takeaways
|
Why Do Post-Installation Checks Matter for HVAC Systems?
Post-installation checks matter because a new HVAC system can look fine and still have either airflow, temperature, or balance problems.
Many homeowners skip checks like testing airflow, comparing room temperatures or inspecting ducts. About 65–90% of residential HVAC systems in the U.S. are found to have at least one installation fault or performance issue.
In Durham homes, we often see issues only after the system runs through real summer humidity or winter heating cycles.
Key benefits of post-installation HVAC checks include:
- More consistent room temperatures
- Better airflow and pressure balance
- Lower utility bills
- Reduced system cycling and wear
- Improved comfort and indoor air quality
- Early detection of installation or ductwork issues
Note: Skipping basic post-installation checks or modifications can be costly or unsafe, so always follow local regulations with a permit and code checklist for HVAC replacements.
How Can You Tell You Have an Airflow Issue After HVAC Installation?

You can’t usually pinpoint the airflow issue exactly when comfort feels uneven or when the system runs longer than expected. Here are some signs that can help you to detect if you actually have airflow issues or not after HVAC installation:
- Hot and cold spots across the rooms. It is often caused by poor duct balance, blocked ducts, or closed dampers. These reduce consistent airflow to certain rooms.
- Pressure inconsistency due to doors slamming or whistling vents.
- Crushed ducts, clogged filters or disconnected ductwork.
- Rooms do not match the thermostat setting.
- Unusual noises like Rattling, humming or whistling often point to airflow restrictions or loose duct components.
- Rising energy bills.
- Short cycling.
- Poor overall airflow.
How to Check Airflow After HVAC Installation in Durham Homes
Measuring airflow after HVAC installation confirms your HVAC efficiency. Proper airflow maintain comfort and indoor air quality in Durham’s humid conditions. You can perform this test at home. That too without any professional intervention.
Before we start the testing, let’s make sure you’re prepared and have the right tools & right info.
CFM Value
Knowing typical CFM (cubic feet per minute) values for different rooms helps you understand whether your HVAC system is delivering the right airflow.
Here’s a practical CFM reference table based on typical Durham residential(2000–3000 sq ft) airflow guidelines and room usage. You can use it when you’re measuring supply air and return air during post‑installation checks:
| Room/Area | Typical CFM Range |
| Master Bedroom | 120–200 CFM |
| Other Bedrooms | 100–180 CFM |
| Living Room /Family Room | 180–300 CFM |
| Kitchen | 200–350 CFM |
| Dining Room | 150–250 CFM |
| Hallway / Coridor | 50–100 CFM |
| Bathroom | 70–120 CFM |
| Office / Study | 100–160 CFM |
| Laundry / Utility | 80–130 CFM |
| Basement / Bonus Room | 150–280 CFM |
When measuring supply and return air, it’s helpful to understand how your home’s Manual J and D calculations influence the ideal airflow. These calculations determine the heating and cooling load, as well as duct sizing, which directly affect the CFM delivered to each room.
Tools Needed for Airflow Checking
You don’t need professional equipment to get a good sense of your system’s performance. Here’s what I use and recommend for homeowners:
- Anemometer: Measures air speed at each supply vent for consistent airflow readings.
- Thermometer or smart sensors: Track temperature differences between rooms to identify imbalances.
- Tissue or paper strip: A quick, simple test for airflow strength at vents.
- Flashlight: Helps inspect visible ductwork for cracks, loose connections, or crushed sections.
- Basic airflow meter (optional): Provides more precise airflow readings to compare against design specifications.
Now let’s dive into the actual steps.
Step 1: Prepare Your HVAC System for Accurate Testing
Before checking airflow, your system must be running under normal conditions. Skipping this step can lead to misleading results.
- Replace or clean the air filter. Make sure they are not clogged before testing. They can reduce airflow and give inaccurate readings.
- Open all supply and return vents. Make sure no vents are blocked by furniture or rugs.
- Set your thermostat to a steady temperature( 74–76°F for summers and 68–70°F for winters).This ensures the system is running consistently for accurate measurement.
- Let your system run for at least 15 minutes. It ensures your system has reached it’s normal operating conditions. So airflow and temperature readings are accurate across all rooms.
- Make sure your blower fan is running without strange noises. If you hear strange noises, then consult a professional.
- Close exterior doors and windows. Avoid outdoor drafts that could skew airflow or temperature readings.
This preparation allows airflow, temperature and pressure inside the home to stabilize so your readings reflect real performance, not temporary conditions.
Step 2: Measure Supply Air at Each Vent
This step shows how well your HVAC system is delivering air to each room.
Stand in front of every supply vent while the system is running:
- Hold an anemometer or basic airflow meter 2-3 inches away directly in front of the vent. It shows air strength between rooms.
- Take several readings to get average air velocity.
- Multiply the average velocity by the vent area to get the airflow in cubic feet per minute(CFM).
- Check the CFM value above for your specific area in your house.
- If you do not have a meter,you can still perform this airflow verification test. Hold a tissue or paper strip near the vent and observe how strongly it moves.
- Note which rooms have strong airflow and which feel weak.
Keep in mind the relationship between static pressure, airflow and your HVAC system. High static pressure can reduce airflow, causing uneven temperatures and stressing your system. If the temperature feels uncomfortable then you can increase the air flow in your home.
Understanding this helps identify whether low airflow is due to vent blockages or system design. In Durham homes, upper floors or rooms far from the HVAC unit often show weaker airflow first. Uneven airflow here can lead to hot or cold spots and reduced comfort.
Step 3: Measure Return Air Flow
This step is necessary because it ensures air is circulating properly back to the HVAC system. The right amount of return air prevents pressure imbalances, uneven temperatures, and extra strain on the fan and motor.
- Place your hand or tissue near the return vents to check for steady suction. You can use an anemometer as well. If so, then calculate the CFM value.
- Compare airflow between returns on different floors.
- Weak airflow can indicate blocked vents, dirty filters, or duct restrictions.
Poor airflow from the return ducts forces your HVAC system to work harder and reduces energy efficiency. It can also shorten the life of the fan and motor.
Step 4: Compare Room Temperatures
You need to compare room temperatures, you can identify uneven airflow or duct imbalances that make some rooms too hot or too cold.
- Run your system for 15 to 20 minutes first.
- Use a thermometer or smart sensor in each room.
- Rooms should be within a few degrees of each other.
Ideally, room temperatures should be within 2–3°F (1–2°C) of each other. Larger differences (more than 3°F) often indicate airflow imbalance, duct restrictions or vent issues. Even if air is coming out of the vents.
Step 5: Inspect Visible Ductwork

Inspecting visible ductwork allows you to detect even small leaks, disconnections or crushed sections can restrict airflow and reduce comfort. Duct problems are one of the most common post-installation issues.
- Use a flashlight to inspect visible ductwork in attics, crawl spaces or basements.
- Look for crushed sections, loose connections or disconnected ducts.
- Check for sharp bends or sagging ducts that restrict airflow.
Even small duct issues can reduce airflow, increase energy use and create uneven comfort throughout the home.
Step 6: Check Vent Position and Obstructions
Checking vent position is necessary because blocked or partially closed vents can restrict airflow. It also reduces overall HVAC efficiency.
- Measure airflow output as it is by CFM technique
- Make all vents fully open.
- Remove rugs, furniture or curtains blocking airflow.
- Compare airflow output again after clearing obstructions.
Blocked vents are a simple but common cause of poor airflow in newly installed HVAC systems.
Step 7: Listen for Air and System Noises
This step detects unusual sounds. These could indicate airflow restrictions, loose components or system issues affecting comfort and efficiency.
- Listen for whistling, rushing air or rattling near vents and ducts.
- Loud airflow noises often signal pressure imbalance or restricted ducts.
- Rattling may point to loose components or duct connections.
Quiet and steady airflow usually means your system is moving air efficiently.
Step 8: Observe System Cycling Behavior
Observing how often your HVAC turns on and off helps to identify airflow problems or system imbalance. It is directly related to energy wastage and reduced comfort. Pay attention to how often your HVAC system turns on and off.
- Short cycling combined with weak airflow. It indicates airflow restrictions.
- Long run times with uneven comfort. It points to duct imbalance or airflow loss.
This step helps connect airflow issues with energy use and system reliability also.
Step 9: Compare Results Against Expected Comfort
Comparing results gives you a clear understanding how your HVAC system is delivering even airflow and consistent temperatures; throughout your Durham home as designed. Not only closed rooms, even rooms far from the HVAC unit should receive steady airflow.
- If some rooms consistently feel uncomfortable, airflow is likely to be imbalanced.
- Document airflow strength and room temperatures for each space.
- Patterns help identify whether the issue is localized or system-wide.
Keeping notes also helps if professional airflow balancing or duct adjustments are needed later.
Step 10: Track Results Over Time
Tracking your results over time helps to catch intermittent airflow or comfort issues that may not appear during a single test. Some airflow problems only show up under real conditions.
- Check airflow and temperatures at different times of day.
- In Durham, high humidity and peak summer heat often reveal airflow issues that are not obvious at first.
- Repeat checks after extreme weather changes.
Tracking airflow over time helps homeowners protect comfort, energy efficiency, and long-term HVAC performance.
Air Balancing Tips & Tricks After HVAC Installation in Durham Homes
Airflow balancing means adjusting how air is distributed so every room receives proper heating and cooling. Many homeowners complain that Upstairs rooms often experience weaker airflow. Here’s what you can do to balance airflow in post HVAC installation phase even for upstairs rooms too:
- Open vents in rooms with weak airflow
- Slightly close vents in rooms receiving too much air
- Check for blocked or crushed ducts
- Replace dirty filters regularly
- Keep return vents clear
- Adjust dampers if accessible and labeled
- Set the thermostat setting on from AUTO for rooms struggling with stagnant air.
- Invest in a second air handler for a three or more story building.
- Install return vents in all major rooms.
- Install a properly sized furnace, especially for colder months.
If airflow remains uneven after these steps, a professional approach to airflow balancing, such as adjusting blower fan speeds or ducts, is needed to protect system performance.
Airflow Tips During Seasonal Changes in Durham After HVAC Installation
Seasonal weather in Durham affects airflow, comfort, and energy efficiency more than many homeowners expect. Even a properly installed HVAC system can struggle. Making small seasonal checks helps maintain steady comfort and protects long-term system performance:
Summer (Durham’s hot and humid months):
Check each vent for steady airflow, especially in upstairs rooms. Because humidity impacts HVAC efficiency in Durham, checking airflow in these months is critical. Proper airflow ensures your system can remove excess moisture and maintain comfort throughout your home.
Winter:
Make sure warm air reaches every room evenly. Poor airflow during colder months causes cold spots and longer system run times. It raises energy bills. Adjust vents or dampers to maintain balanced airflow throughout the home.
Older Durham Homes:
Inspect for insulation gaps, leaky ducts, and other common air leaks in older construction. Sealing these issues helps maintain consistent temperatures and improves overall energy efficiency.
Zoned HVAC Systems:
Confirm each zone reaches its set temperature. If one area feels off, dampers may need adjustment. Persistent imbalance usually requires a technician to properly balance airflow and protect system reliability.
DIY Airflow Troubleshooting for Post HVAC Installation

Troubleshooting helps you to catch airflow problems early and avoid unnecessary strain on your HVAC system. Simple checks can confirm whether airflow issues are minor or need professional attention.
You can troubleshoot by:
- Replacing clogged air filters
- Checking for blocked or closed vents
- Inspecting visible ductwork for damage
- Listening for unusual airflow or system noises
- Monitoring room temperatures for imbalance
- Watching for frequent system cycling
- Tracking changes in energy bills
If these steps do not improve comfort or airflow, we recommend calling an HVAC professional. In Durham like Alternative Aire.
The Link Between Airflow and Energy Waste After HVAC Installation
Airflow problems quietly increase energy use and shorten system life. When air cannot move freely through ductwork, your HVAC system runs longer to reach the thermostat setting. That extra runtime strains the fan, motor and electrical components while driving up utility bills.
In Durham weather, high summer humidity and long cooling cycles make proper airflow even more important. Small airflow restrictions can turn into noticeable energy waste if they are not corrected early.
Here I add a table to show you how airflow problems can waste energy and cost money in your typical 2000-3000 sq.ft. Durham home.
| Problem | Effect | Solution | Cost Wastage Per Month |
| Blocked duct | Reduced airflow | Clean ducts | $30–$50/month |
| Dirty filter | Overworking system | Replace filter | $10–$20/month |
| Uncalibrated thermostat | Uneven temperatures | Recalibrate or upgrade | $20/month |
Conclusion
Post-installation checks protect comfort, indoor air quality and system reliability. Simple DIY inspections like checking vents, ducts and thermostat accuracy catch minor issues early. For complex problems and professional inspections ensure your HVAC system runs efficiently and lasts longer
As a locally trusted Durham HVAC expert, Alternative Aire guides homeowners through all the possible post-installation checks. Our team provides clear advice on what can be handled safely at home and what requires professional tools. This approach ensures reliable comfort, efficient energy use, and long-term system performance.
FAQs
Q: What are the most common HVAC installation errors?
A: Poor duct connections, wrong unit sizing, incorrect thermostat placement or blocked vents.
Q: How can HVAC performance be tested?
A: Use static pressure tests, airflow measurements, and check temperature differences across rooms and vents.
Q: How do zoning issues affect comfort?
A: Improper zoning can cause some rooms to be too hot or too cold. Adjust dampers or consult a technician for proper balancing.
Q: How often should I inspect my ducts?
A: At least once or twice a year especially in attics or crawl spaces.